|
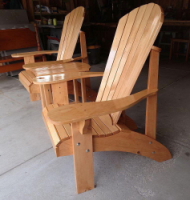
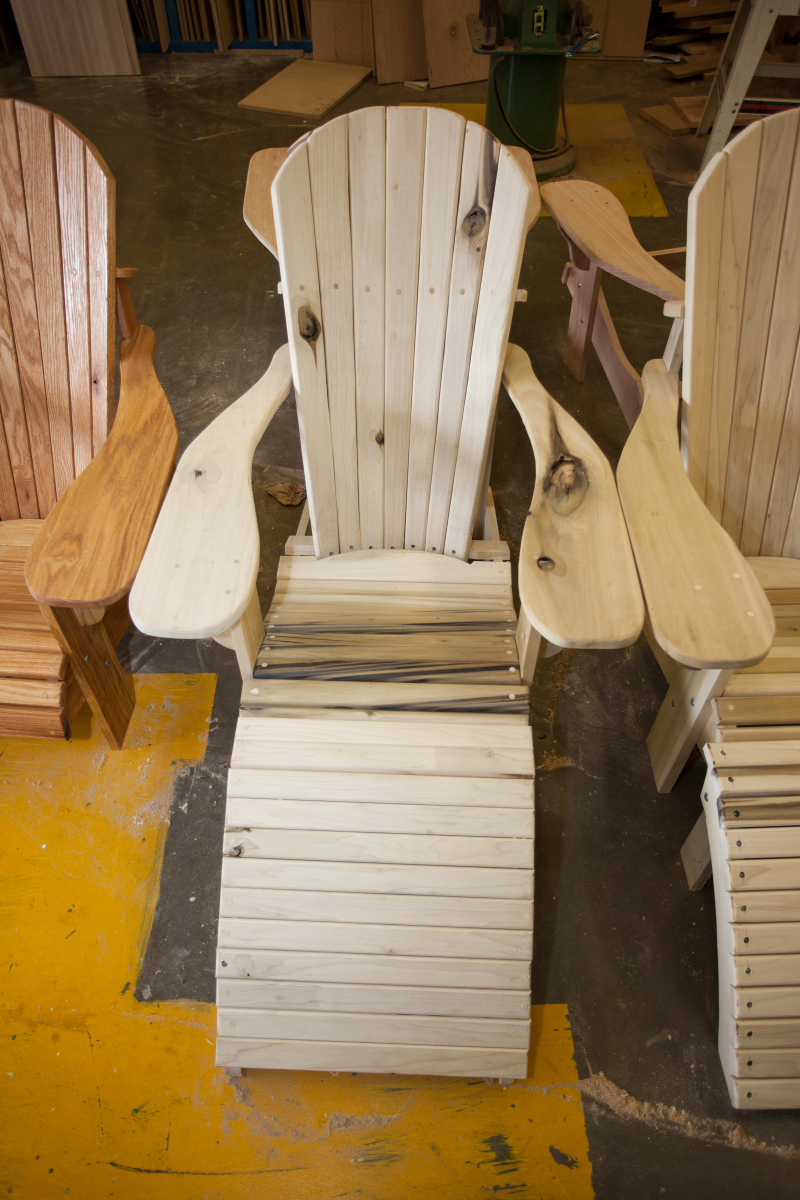
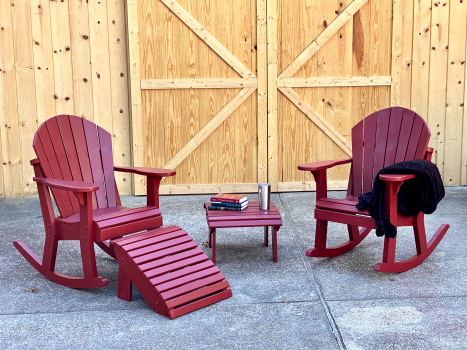
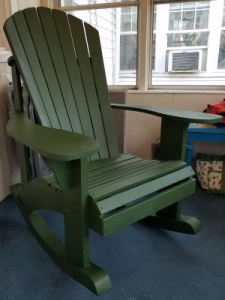
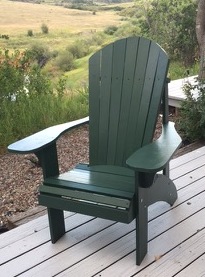
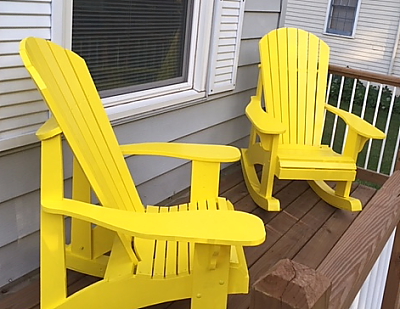
Monday, January 11, 2021, 10:18:59 a.m. EST
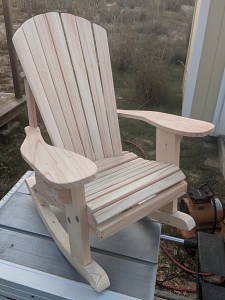
Here are pics that you asked for...everything went well with your instructions.
Working on the rocker next. Thanks.
Courtney, Moore OK

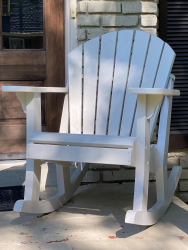
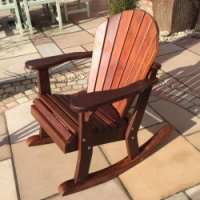
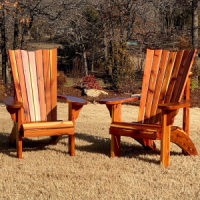
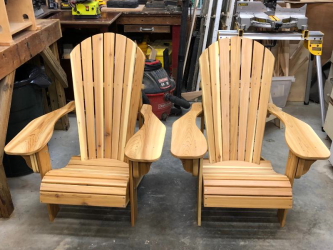
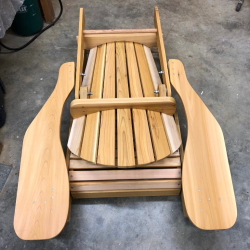
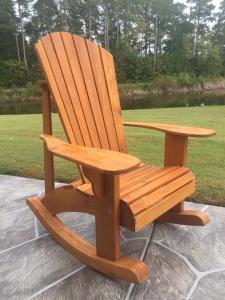
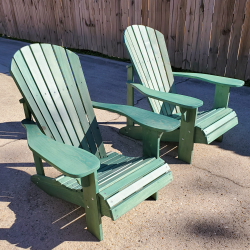
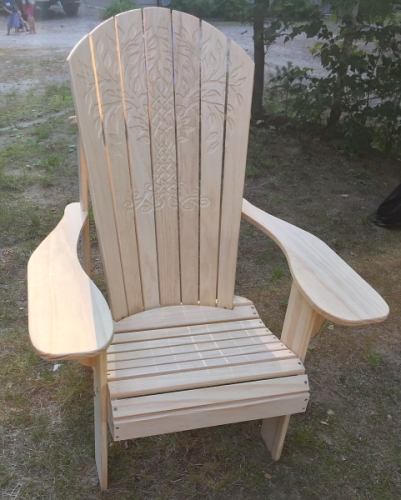
Saturday, January 2, 2021, 07:21:51 p.m. EST
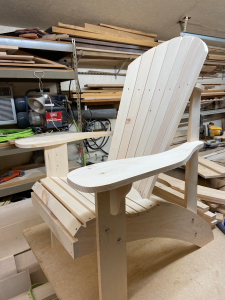
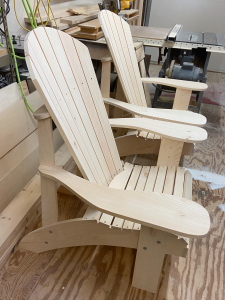
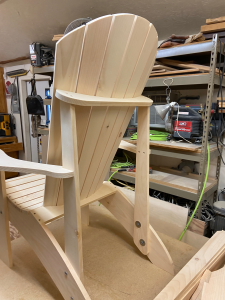
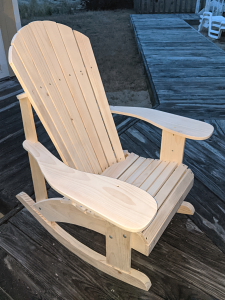
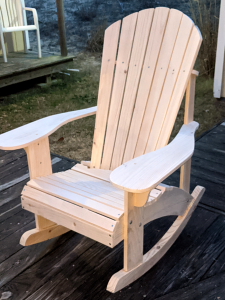
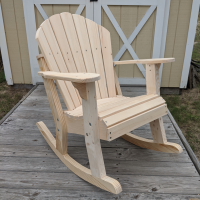
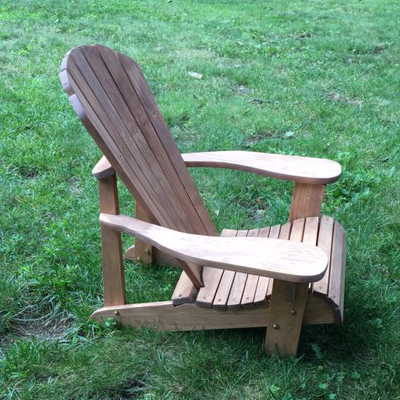
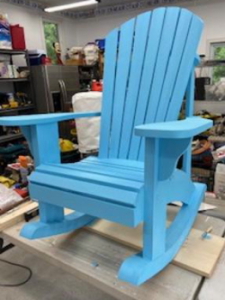
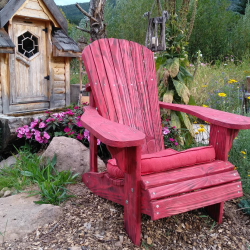
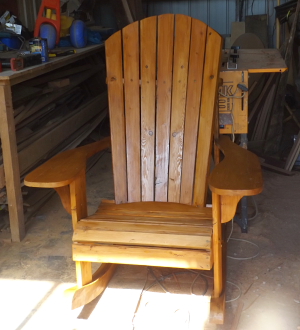
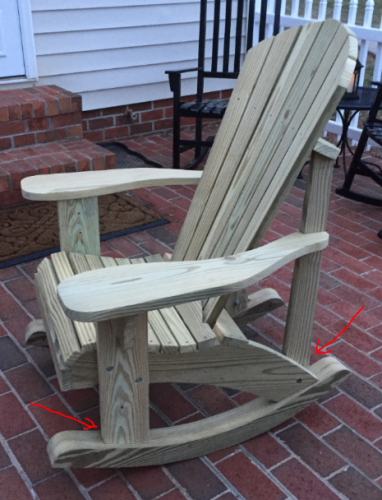
Happy New Year Phil, I just completed my first project of the new year,
the Muskoka Adirondack Rocking Chair. I am very happy with the final result and hope to make a mate or two to go
with it. I appreciate the full size plans and step-by-step instructions. There are definitely a few more projects
in my near future!
Don Finn, Virginia Beach, Virginia
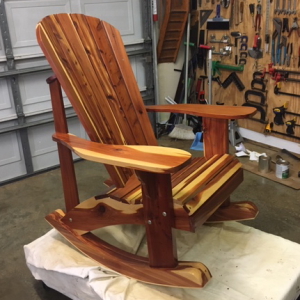
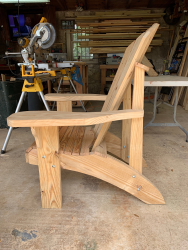
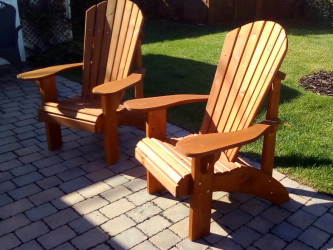
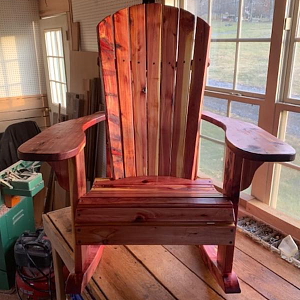
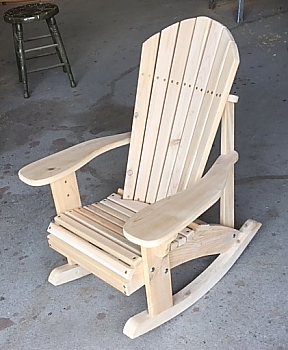
Saturday, January 2, 2021, 05:09:24 p.m. EST
I used 20mm stock scottish red cedar. They are very sturdy with the extra
support. The next one I make is going to be Japanese red cedar. I have a local saw mill on the out skirts of the
village where I live, they cut it at 23mm. I plane it down to 20mm myself with a dewalt 733 thicknesser does a
great job. Robert Roy, Scotland
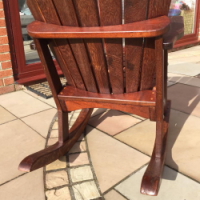
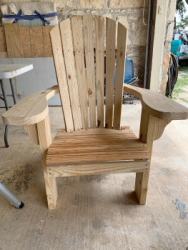
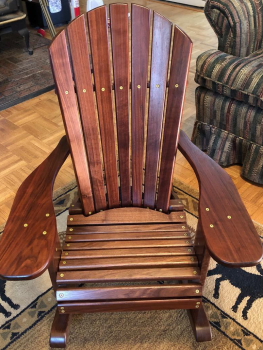
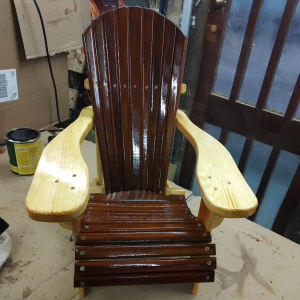
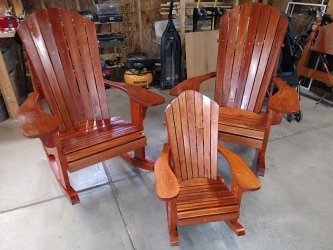
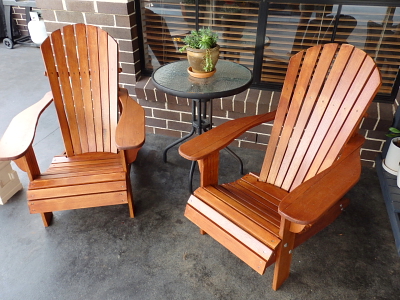
Tuesday, December 22, 2020, 04:08:53 p.m. EST
Hi Phil, We got a Grandpa chair put together made with African Mahogany.
My 81 year old father loves it.
Craig, Fort Worth, TX
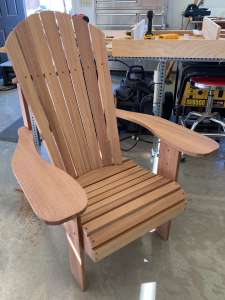
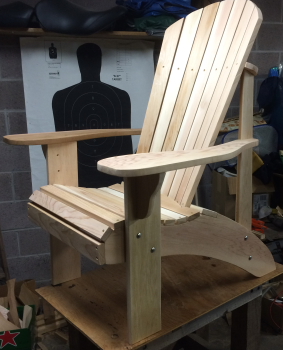
Friday, December 11, 2020, 05:28:16 p.m. EST
Just wanted to send you a picture of the chair I made from your plans.
The plans and templates were excellent.
Thanks, Paul Niles
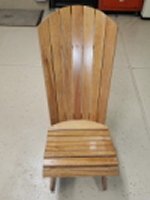
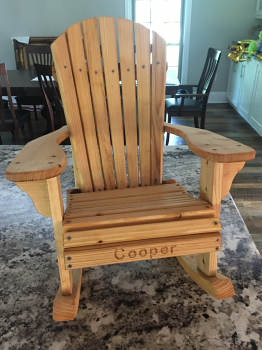
Wednesday, December 9, 2020, 08:10:53 a.m. EST
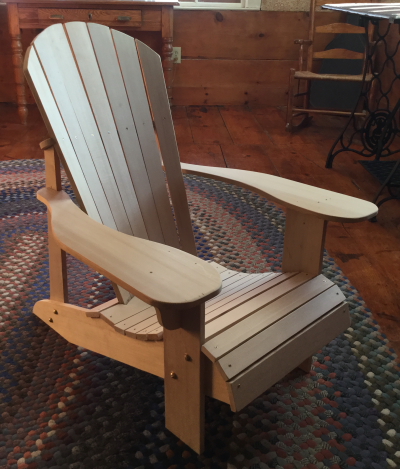
I very much enjoyed building this chair for my granddaughter, using the
plans I purchased from you.
Doug Musca
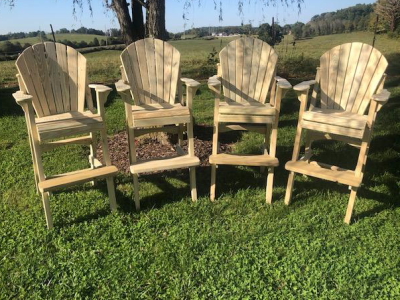
Sunday, November 29, 2020, 12:06:59 p.m. EST
Hi Phil, Dad has them done, working on a table. They remind me of adult
high chairs since they are so tall ! But look amazing. He said a lot of work for an 85 yr old though.
Thanks again !! Stay safe & happy Holidays! Diana Stackhouse
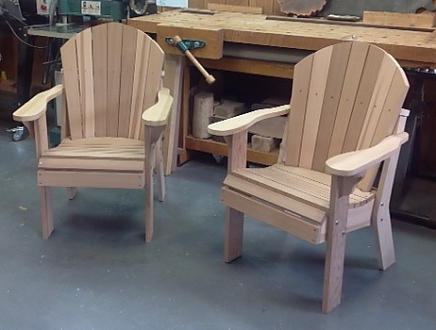
Wednesday, November 25, 2020, 11:42:44 a.m. EST
I have enjoyed the chairs. I expected them to look good, but everyone
is surprised by how comfortable they are. I was impressed with how thorough and accurate your plans were. Thanks
!
Jim Pringle, Topsail Beach, NC
Thursday, November 19, 2020, 09:53:18 a.m. EST
Phil, I thought you might want to see the end result of all the times
I bugged you for help....it was a challenge. Some things I havent done before. The wood is black walnut. The finish
is a diluted polyurethane and boiled linseed oil. 6 light coats. Im pleased. Thanks, I may order the Youth version
for possible future use. Andy Cotton, NC
Wednesday, November 18, 2020, 06:26:14 p.m. EST
Hey Phil. My first woodworking project is done (mostly). Just wanted
to say thanks for the plans and instructions. My family thinks Im a real woodworker ! Cheers, Curtis Karr, Montgomery
TX

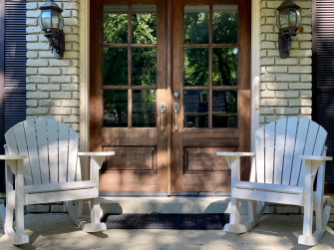
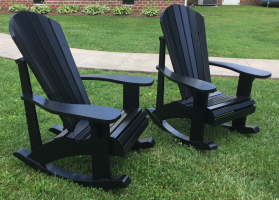
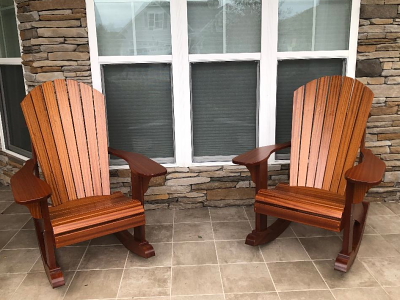
Wednesday, November 18, 2020, 12:23:19 p.m. EST
Hey Phil, Finally got the rockers done! I used Sapele for these and applied
Gleam Boat Varnish to protect against the North Carolina sun. Everyone that passes by comments on how beautiful
the wood looks and how comfortable they are once they try them out. Next project is to make matching side tables.
Pete Meunzen
Thursday, November 12, 2020, 11:04:42 a.m. EST
Finished another set....George
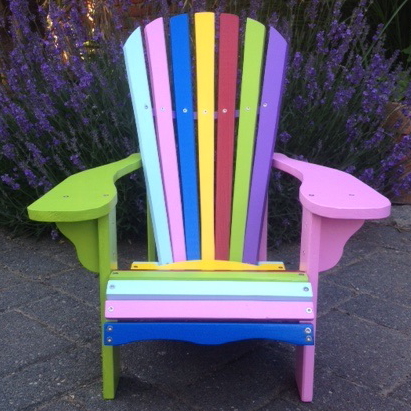
Thursday, November 5, 2020, 07:00:28 p.m. EST
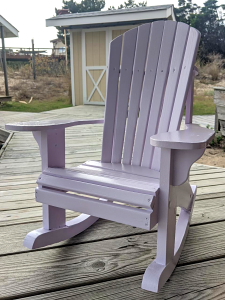
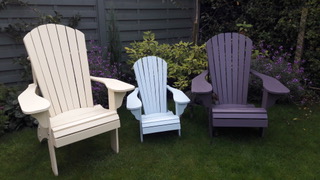
Hi Phil,
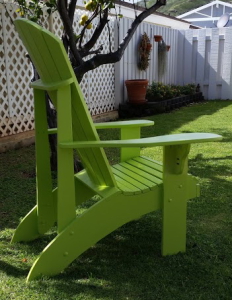
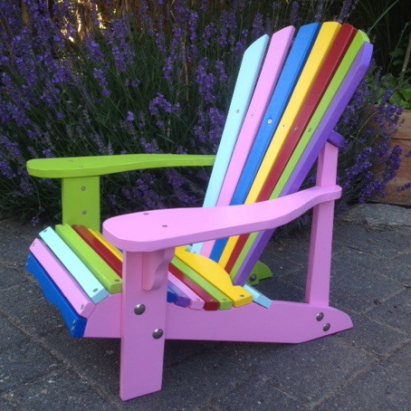
I just completed making the Child Adirondack Chair and my wife painted it lavender for our granddaughter who turns
1 year old later this month. I used 1/2 inch cedar and 1 inch pine for this project. I am very happy with the results
and the detail of your plans! I have other plans and projects I'll be tackling over the winter months!
Don Finn, Virginia Beach, VA
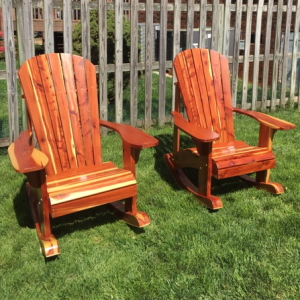
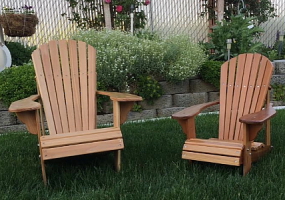
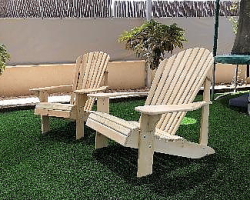
Saturday, October 17, 2020, 02:54:17 p.m. EDT
Here are 2 chairs of your plans. Armand Coulombe, Quebec
Thursday, October 15, 2020, 04:54:23 p.m. EDT
Thanks for your help, Randy Wessel, NC
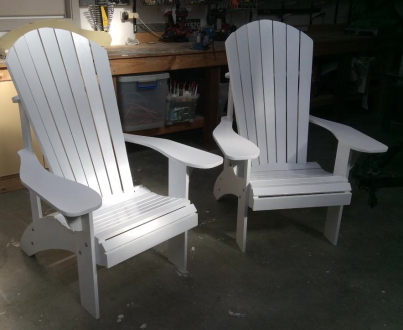
Tuesday, October 13, 2020, 09:39:26 a.m. EDT
Phil, Here are the chairs I made. Mike Anderson, Bluff City, TN
Saturday, October 3, 2020, 08:41:43 a.m. EDT
Good morning Phil. I must say I have enjoyed this project very much and
plan to build six rockers and six folding chairs from your plans. I will send you a picture of my first chair,
in another email to follow. Thanks and Kindest regards, Be safe,
Rick Sheperd
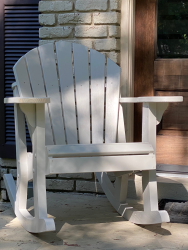
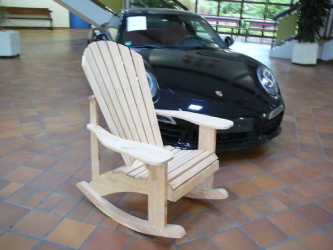
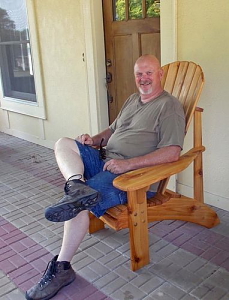
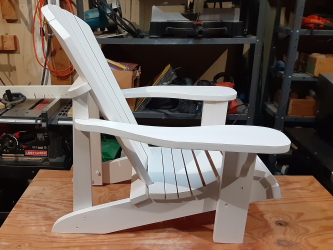
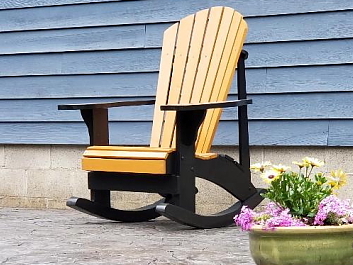
Friday, October 2, 2020, 08:24:23 p.m. EDT
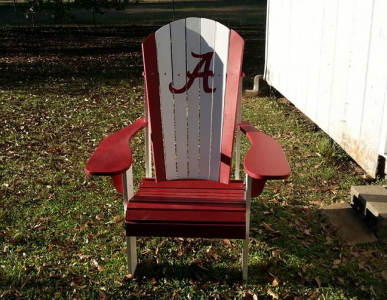
Thanks Phil, I appreciate your plans and the full size templates. I posted
a photo and a review of the Nana's rocker this week on Etsy (the tall Adirondack conversion), it came out pretty
nice. Going to paint it up and give it to my father-in-law for his front porch. I'm looking forward to the additional
fall projects. Thanks!
Don Finn, Virginia Beach
Thursday, October 1, 2020, 12:36:01 p.m. EDT
Another satisfied customer! Hi Phil, Just wanted to thank you for the
plans. The rocker turned out super! Great design, easy to follow, beautiful result. I appreciate you sharing your
talent and making my life easier.
Patrick McDonald
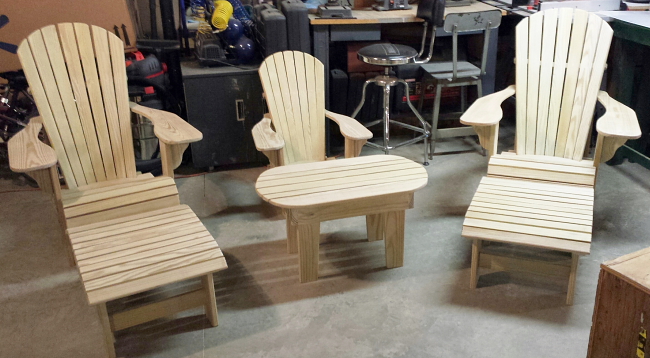
Sunday, September 6, 2020, 10:20:18 a.m. EDT
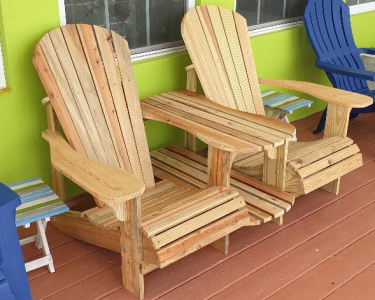
Hello, Phil, ...I recently completed my latest project using your plans
for the Adirondack Table and High Chairs for the porch at our cabin in upstate New York (photo attached). I built
them out of cypress and finished them with 3 coats of Minwax Helmsman Spar Urethane. I made them at bar height
which allows us to see over the porch railing (something my wife has complained about for years!). The set is very
attractive and we find the chairs to be very comfortable and sized perfectly for adults. Thanks for all you hard
work in designing and creating the plans. I enjoyed building them and they look great.
Paul Behrens
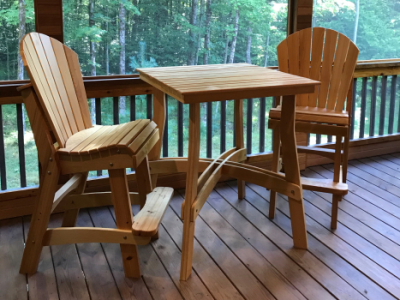
THESE ARE THE ARMLESS BAR CHAIRS WITH 21" SEAT
AND 36" BAR TABLE
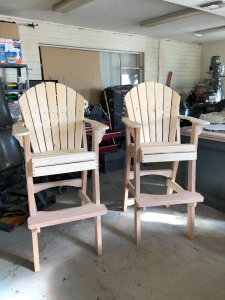
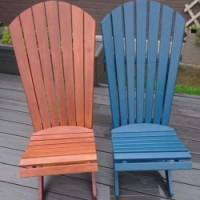
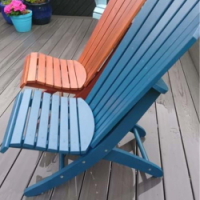
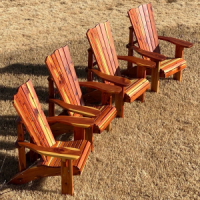
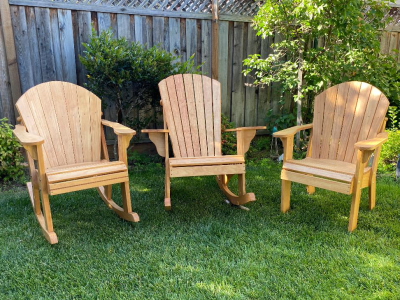
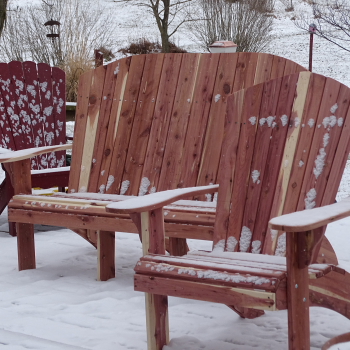
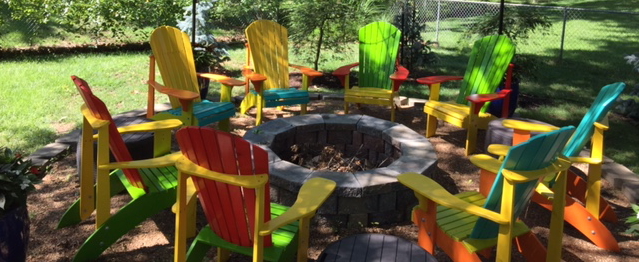
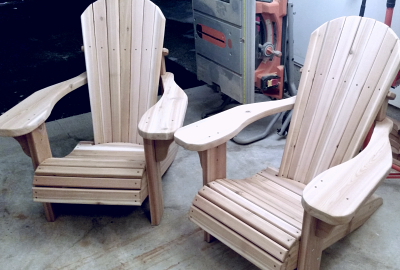
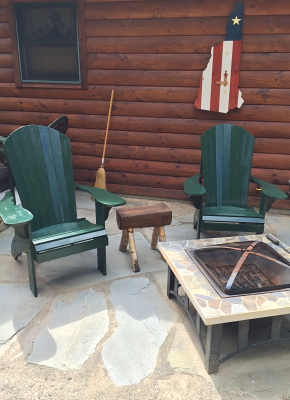
Friday, August 28, 2020, 12:14:45 p.m. EDT
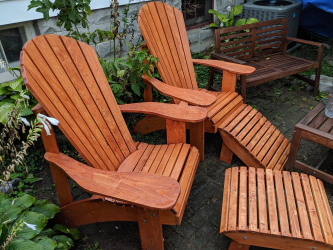
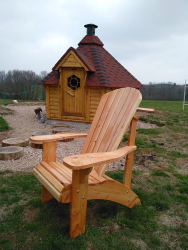
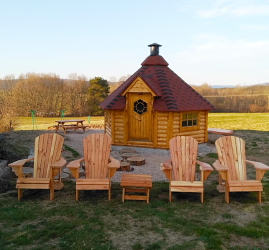
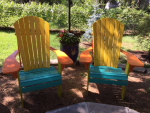
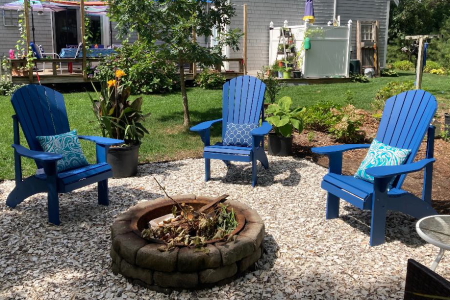
Hi again, Phil! Just wanted to follow up and send the fire pit pic. Our
two dear friends just got married amidst all the challenges in the world and my wife and I worked together to make
them chairs as a wedding gift. Heres all three before we bring the other two over to their brand new house! Youll
be hearing from me soon as Ill need something to keep me occupied to ease the stress of returning to work as a
schoolteacher in a few weeks!
Thanks again so much for the design. These are a huge hit! Take care! .... Warmly, Justin Bourassa
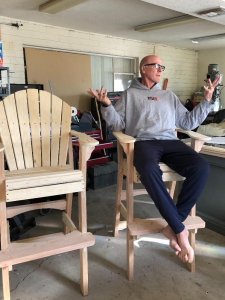
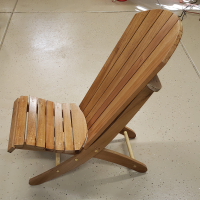
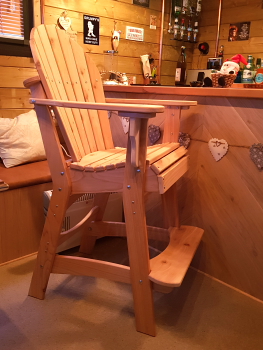
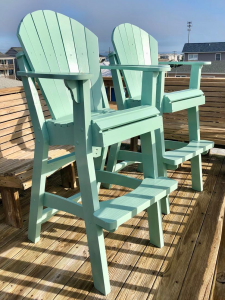
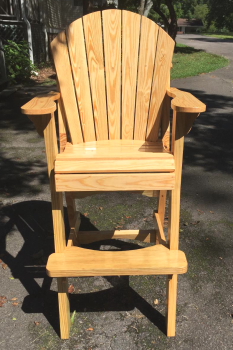
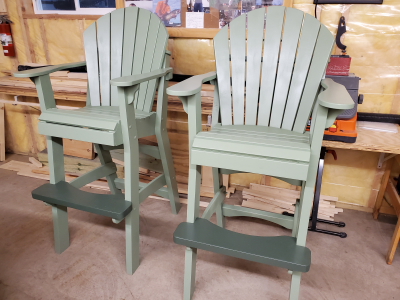
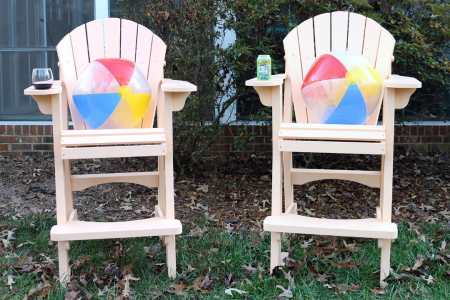
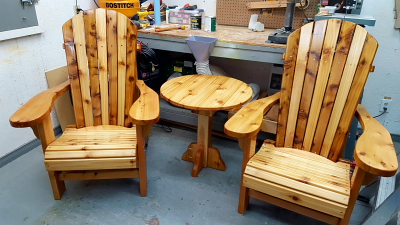
Monday, August 24, 2020, 04:40:46 p.m. EDT
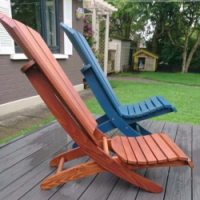
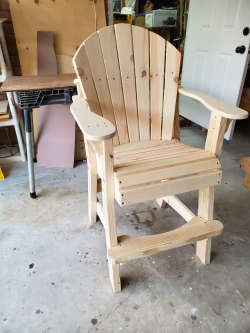
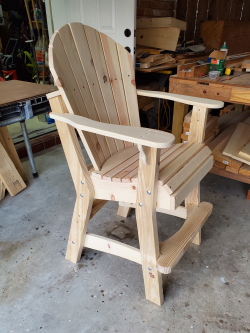
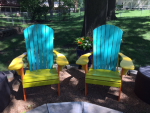
Hi Phil,
I thought when I finished my first tall deck chair (shown below August 4th), I would be starting on an armless
one, but got side tracked. I called my friend Bill to take a look at the first chair. He said great chair Dave,
only one problem where am I going to sit! Back to the big box store to get more lumber. I finished the second chair
and called Bill to take a look. Bill said hey these are nice comfortable chairs, only one problem where am I going
to put my beer! Back to the big box store again for lumber, order your tall table plans, set to work on my first
tall deck table. I finished the table yesterday. Called Bill to take a look, he's happy now, he has a place to
sit and a place to put his beer.
It is good to keep Bill happy because he always brings the beer ! :-)
Cheers, Dave Johnson, SC
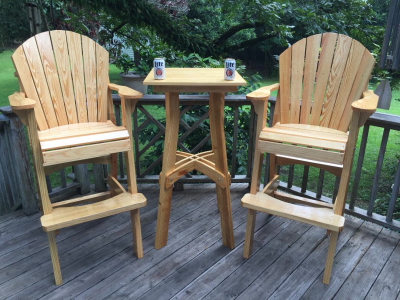
THIS IS THE TALLEST OF THE 3 CHAIRS WITH AND A MATCHING
24" TALL TABLE
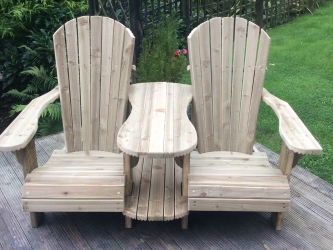
Monday, August 24, 2020, 10:42:46 a.m. EDT
Hi Phil ... Thanks very much for sending the templates of the settee.
Just a wee photo of my project using decking boards as the main material. Not everyones choice, but there were
enough off cuts to do the job. At least it wont blow away in a wind!!!
Thanks again, Declan Thornton
Monday, August 17, 2020, 12:37:59 p.m. EDT
Phil, built the chairs with treated lumber and galvanized bolts to cope
with our Texas gulf coast environment! Very comfortable and sturdy
Robert Van Borssum
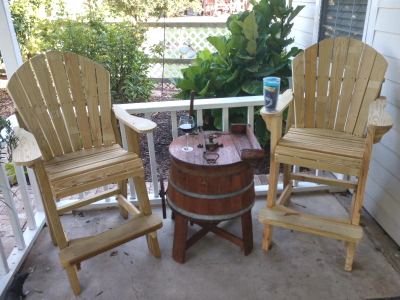
Saturday, August 15, 2020, 09:21:56 a.m. EDT
Thanks Phil, just finished and they are awesome!!!! Scott Jones
THESE ARE THE COUNTER HEIGHT CHAIRS
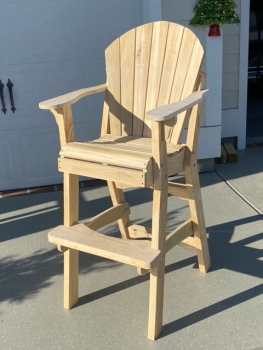
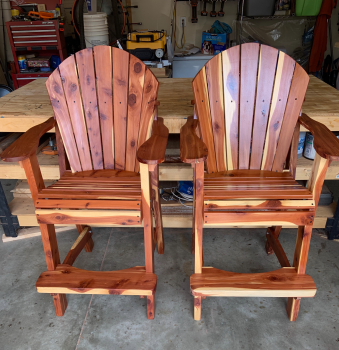
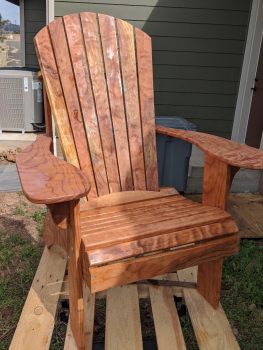
Tuesday, August 4, 2020, 12:12:12 p.m. EDT
Hi Phil, Finished my first chair. Wood is Southern Yellow Pine, heavy,
but has a nice grain when left natural. Finish is 3 coats of high gloss poly.Nice plans. Will start on armless
counter chairs next. Dave Johnson, SC
THIS IS THE TALLEST HEIGHT CHAIR OF 3 AVAILABLE IN
THE PLANS
Tuesday, August 4, 2020, 11:02:18 a.m. EDT
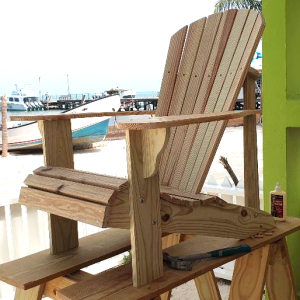
I do want to show you my shop. It's literally a set of saw horses on
the beach. I had to cut the whole chair with a circular saw and a jig saw. Gene Williams, Belize.
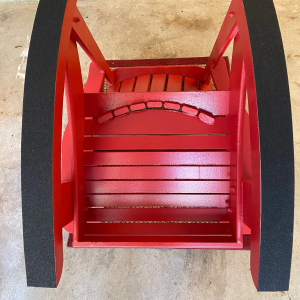
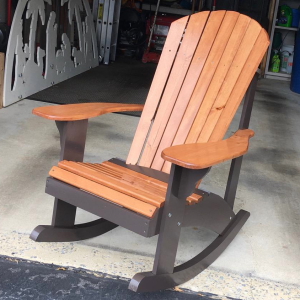
Monday, July 27, 2020, 05:25:15 p.m. EDT
This whole effort was quite a job for me. I have just retired and had
not done much woodworking in the past 30 years. But this allowed me to re-constitute my workshop with new tools
:). Also, the tread on the bottom rockers has worked out well. Thanks for the plans and your help! Brad
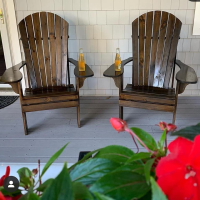
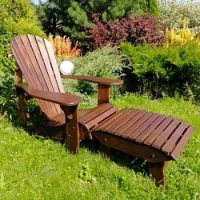
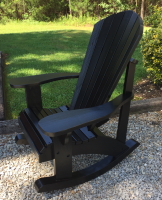
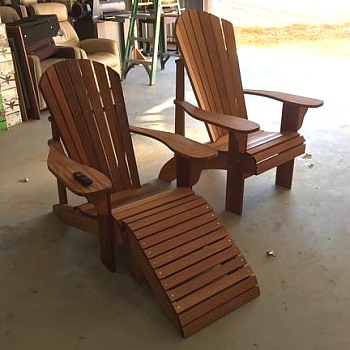
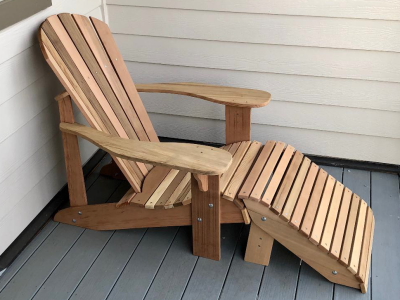
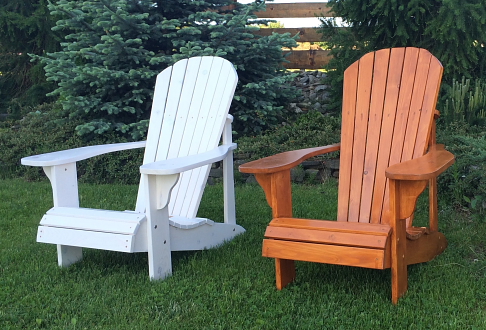
Thursday, July 16, 2020, 08:54:47 a.m. EDT
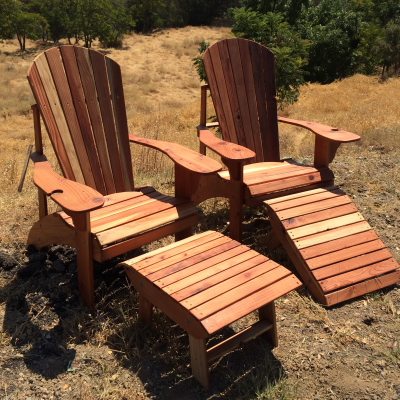
Hi Phil, Just wanted to share the results of my latest project. I made
two chairs out of Spanish Cedar and put on 6 coats of Gleam Gloss Spar Varnish. Everyone that passes by cant help
but comment on how beautiful they are! Pete Muenzen
Thursday, July 16, 2020, 11:09:47 p.m. EDT
North West Red Cedar bare wood by Greg Copperwheat
Jun 27, 2020, Facebook message
Hi Phil, I've just finished these 2 chairs. The cedar one is mine and
the other one is a birthday present for my son. I really enjoyed making them. Your plans are very easy to work
with and for back up your video on Facebook, Thanks, Kevin Maguire
Jun 19, 2020, Etsy conversation ( purchased 31 Digital PDF plans )
I made a pair of the Nanas Rockers. I changed the arms just a bit. Turned
out great. Thanks for the plans. George
09 Jun, 2020, Etsy review
This was my first attempt at a detailed project like this and the first
chair was a great success and I have since completed chair 2 and a bar top table (see photos)! The full-size plans
were supplemented by detailed online instructions and photos to aid in cutting and assembly. I didn't have to figure
out angles when cutting the templates that I put on a 1/8 inch backer board. Excellent product--thanks Phil !

Sent: Tuesday, June 2, 2020, 07:37:46 p.m. EDT
Thought you would like to see 3 of the 4 chairs I made from your templates.
I did some slight modifacations. So slight you cant even notice. I used clear pine with a light stain followed
by 4 coats of lacquer finish. Dick Specht
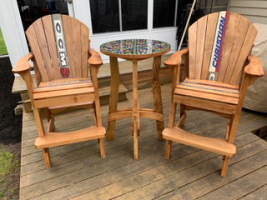
Monday, June 1, 2020, 12:51:27 p.m. EDT
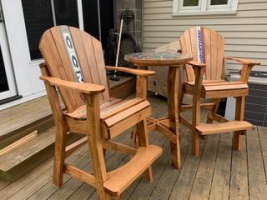
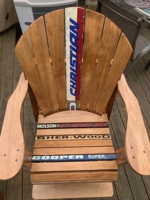
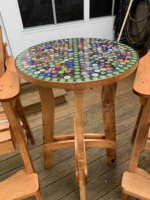
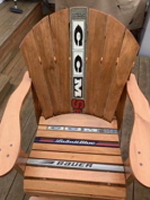
Phil - Heres a few pics of a set I made from your plans. Youll see
that I incorporated some old hockey stick shafts into the chairs. I drew the inspiration while looking at one of
your instagram posts about assembly. I noticed that the TV in your shop was on and you had a maple leafs game on
it !! I am a HUGE hockey fan. Played and coached hockey my whole life. Also, the table is made from beer bottle
caps. Which, of course, drinking beer is a hockey players favorite thing to do other than playing! I hope you like
my twist on your great design. GO SABRES !! Please feel free to share these as you wish if you would like.
One other thing. I have a number of your plans and am in the midst of making a set of the grandma chairs and
a set of the Adult chairs as well. Thanks for your designs ! Regards, Chuck R. Webster, NY
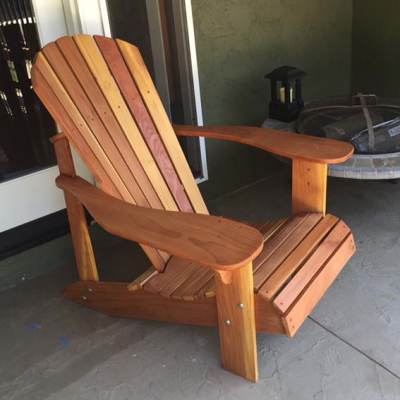
Sunday, May 31, 2020, 09:28:22 p.m. EDT
I just thought it was redwood, but have been told it is "curly"
redwood. Made it 1" thick with longer bolts and REALLY like how it turned out. Thank you! Tim
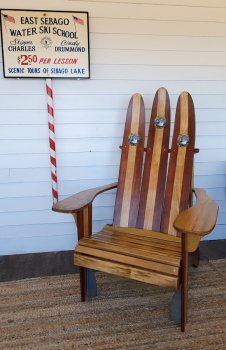
Sunday, May 31, 2020, 10:13:04 a.m. EDT
Hello Phil....I recently purchased your plans for the Grandpa Adirondack
chair and wanted to both thank you and compliment you on the quality of the design and the plans. I am attaching
a photo of the chair I built from your plans as I thought you might appreciate some of the "modifications"
made along the way. Most noticeably is that I constructed the primary components from vintage waterskis. Given
the width of the skis (used for the back slats), I also increased the width of the chair from 21" to 23",
and constructed the side panels from 2"x10"s.
Again, thank you for a great product as I admire your work and your entrepreneurism. Very best regards, Barry Nelaon
Thursday, April 30, 2020, 11:24:26 a.m. EDT
Hi Phil, Just wanted to say that your plans are great, very easy to work
with. I've been making the standard Grandpa chair and stool so far, in stained pine with a few coats of polyurethane.
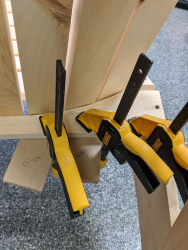
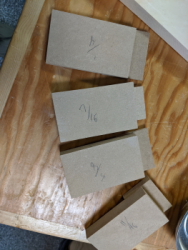
I took your suggestion of making an assembly box, and I already had a taper jig. The only other jig that I use
is to set the height of the back slats: once I figured out how far each slat extends past the bottom support in
order to get the top aligned nicely, I made spacer jigs out of some MDF. Clamp them to the bottom support, set
each slat in place on the little "shelf", insert the side spacers at the top and bottom, and drill/screw.
Cheers, Don
Wednesday, April 29, 2020, 05:18:58 p.m. EDT
Thanks Phil, Beautiful plan well designed throughly explained
Tracy, De Pere, WI
THESE ARE THE TALLEST HEIGHT CHAIRS OF 3 AVAILABLE
IN THE PLANS
Thursday, April 23, 2020, 10:37:52 p.m. EDT
Got them yesterday, first one done. 5/4 pressure treated and 2X for the
rockers. David Gier

Monday, April 6, 2020, 04:41:38 a.m. EDT
This chair was made mostly from one piece of 100 year old dental work
top 1" inch thick. I made an extra piece on each side so that the slats could be screwed from underneath.
I am very pleased with the end result and all the plans where very accurate. I used Osmo decking oil that was recommended
for tight grained hard wood. This project has kept me busy while the Coved 19 is doing the rounds, stay safe,
Brian Bartley, United Kingdom
.
Saturday, March 28, 2020, 12:51:12 p.m. EDT
Hey Phil, I finally got around to finishing 2 chairs using your wonderful
plans, which the templates were spot on by the way! They turned out great and they were level with no tweaking
to get them that way. Jon Flynn
Saturday, March 21, 2020, 06:24:57 a.m. EDT
Phil, just finished the child chair using reclaimed pine floorboards
and cedar cladding. Thanks Brian
Sunday, March 8, 2020, 12:29:44 p.m. EDT
Phil, I have already made the rocking chair and grandpa chair. I am looking
forward to completing the family set. I am strictly amateur. I enjoy the making. I mostly use reclaimed wood. Thanks,
Brian Harris
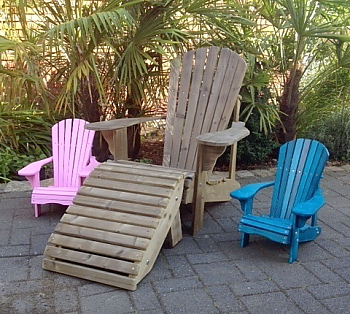
Child & Junior Adirondack Chairs shown
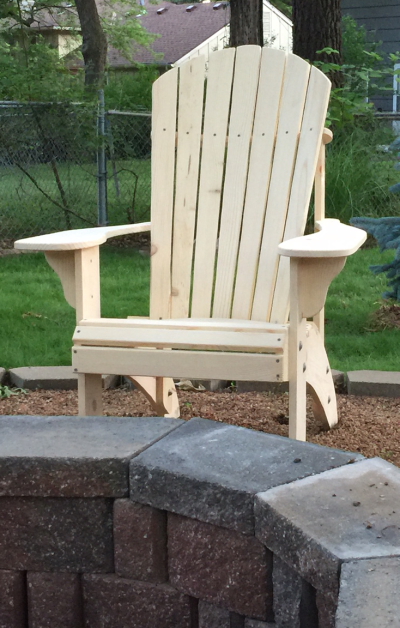
Friday, March 6, 2020, 01:07:37 p.m. EST
I purchased the plans for the non-rocking Adirondack chair and built
a couple as a thank you gift for some friend (see attached photo). They are awesome chairs. Now my wife wants rockers
so Im back for round two!
Thanks,
Dave Colby
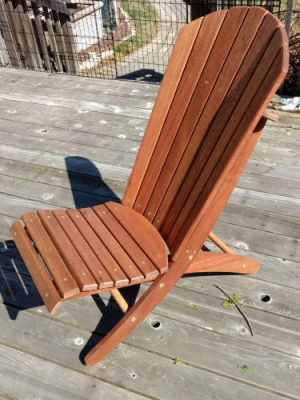
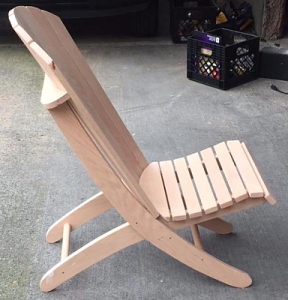
Sunday, February 23, 2020, 04:53:33 p.m. EST
Phil...I just finished making your beach chair. I made it out of mahogany
and finished with 2 coats sanding sealer and 2 coats of spar urethane. It turned out as a nice winter project in
my heated garage. Ill enjoy it on my deck this summer.
Thanks for a great set of plans and also for the tapering jig. It really helped.
Thanks,
Bob Bales
January 1, 2020, 9:11:05 p.m. EST, Etsy Conversations
Hi Phil...Just wanted to share photos of the Grandpa Chairs I made for
gifts this year.
I first made this chair exactly per plans in pine, but decided they were a little light for what we were looking
for. But since your patterns and instructions made these so easy to make/follow, only minor adjustments were needed
to upsize to beefier materials.
I purchased 2 rough cut eastern red cedar from the mill and planed down for a modified pattern of 1-3/4 actual
width material on all framing pieces, with 1-1/4 arms and full 1 slats for seats and backs, then added another
brace at the back below arms for ease of moving around as theyre a little heavier than original plan. All stainless
steel screws and bolts.
I also added 1/4 of epoxy on all the feet to keep water penetration to a minimum, then finished the chairs with
WaterLox Marine Sealer & Satin Finish.
These chairs are so very comfortable and the arms are useful for drinks, can even sit a plate on it if eating outside!
We just love them and know they will last many years.
Thank you for making available such a nice pattern for us amateur woodworkers!
Deborah White
December 29, 2019, 2:28:44 a.m. EST
Just finished.
Jon Davis
Clifton Heights, PA
Monday, December 23, 2019, 5:11:06 p.m. EST
Finished one of the chairs today.....thanks for the plans!
Merry Christmas Phil !, Scott Hinegardner
Monday, December 23, 2019, 3:49:57 p.m. EST
Phil, here are the Christmas present chairs to my in-laws for their beach
house. I made the arms 2 longer and 1 wider, and went 1 1/2 on the seat slats. These are 30 bar height. Ill
send pics from the beach house when we get them there ??
Merry Christmas and thank you for your efforts and help! ! Brian Auban
THESE ARE THE COUNTER HEIGHT CHAIRS OF 3 AVAILABLE
IN THE PLANS
Monday, November 4, 2019, 6:52:27 a.m. EST
Hi ya Mr Phil....So just completed a pair of adult Adirondacks. They
are finished with a Behr semi transparent waterproof stain and I'm very pleased with the results....now back to
my 4 chairs and table set I'm doing for my backyard. Will send more pics when i have the set finished.
Sincerely, David L...Rookie of the year
Friday, October 4, 2019, 12:07:47 a.m. EDT
I like ur patterns. 3rd one Ive bought. Thx
Eddie Correa, San Diego CA
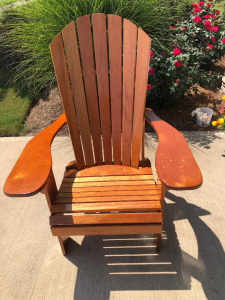
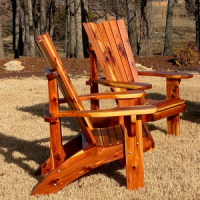
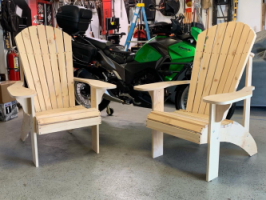
Sunday, September 21, 2019, via Instagram
A perfect pair. Now if I could only get a seat as comfortable as the
Grandpa Adirondack/Muskoka chair on my Versys x300. Finished with dark walnut spar urethane.
Charles Tyler, NY
Saturday, September 14, 2019, 4:46:36 a.m. EDT
Hello Phil, Hope you are well. I tried to put some colour to a chair
I made last week. Before putting a light layer of paint I also burned the wood (japanese technique) Wasn t sure
of the result but seems that many people love it. Next step I will try one with 30 mm thick lumber. Let's see what
it will look like ?? Have a nice week-end in beautiful Canada. Best regards
Gunther
Monday, September 9, 2019, 6:32:11 a.m. EDT
Number 1 finished...counter height ..set of 4 with the table. So i learned
alot on the first one and there are a few oops but nothing i cant live with. 2nd one should be a lot easier. Thanks
again for all your help and look forward to other projects in the future. Your plans are awesome and i will be
purchasing more if them take care. Sincerely
David
Rookie of the year
THESE ARE THE COUNTER HEIGHT CHAIRS OF 3 AVAILABLE
IN THE PLANS
Monday, September 9, 2019, 2:18:23 p.m. EDT
Hi Phil.....Chair one complete.
Michael Costa
Tuesday, August 6, 2019, 12:19 p.m. EDT via Instagram
Hello Phil. I'm Vitaly from Moscow, Russia. 49 years old.
Thank you for your detailed plan. Making a chair was a pleasure. This is my first job with furniture. I'll finish
the job next week. I'll paint the chair and varnish it. And then start to do the second option - Grandpa. I will
definitely send you a report on the work done.
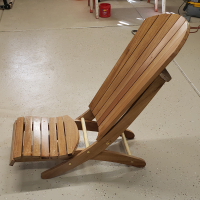
Friday, July 26, 2019, 3:23:06 p.m. EDT
Finally was able to finish the chair and stool. Wife loves it and have
had several compliments on it as well. The fold up design is great. Now to build the second one !
Craig Baldwin

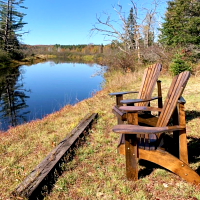
Thursday, July 25, 2019, 7:33:22 a.m.
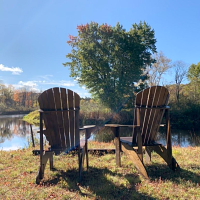
Hi Phil. The plans arrived on time, thanks. I'd already used the rocking
chair plans to cut most of the two chairs but I was waiting on the side rail template to finish up. I made a change
in the front where the seat slats wrap around and I changed out the carriage bolts for a different size. It worked
out perfectly. These are a wedding present and destined to spend their lives on a porch looking out on a pond in
upstate NY. ...Frank Gross
Sunday, July 7, 2019, 4:03:34 p.m.
Phil, Finally got around to working on the chairs. Thanks again for the
great plans; they were perfect! They fold great!
Thanks! Gregg Todd
Sunday, July 7, 2019, 8:46:09 p.m.
Hi Phil, I built two grand pa rockers and a youth rocker to go along
with five other pieces that I've built in the last few years. When the plans arrive I'll be building two grandpa
chairs and a table as a wedding gift. Thanks, Frank
Monday,
May 20, 2019, 10:28 AM....Etsy conversation
My husband and I recently purchased the grandpa Adirondack chair from
you. We built the templates and our first chair this weekend. Turned out great. We couldn't believe how comfortable
the finished product was! Great plan. When I think we were about to spend $325 per chair from a local source! Got
the price down to under 50 dollars per chair by using different sized lumber instead of only 12" boards. Because
of the price decrease we were able to "upgrade" to 2" lumber for the legs, front supports, and arm
rests. Makes for an extra sturdy chair. Thanks again for a great plan. Callie Mayo, Texas
Thursday, May 2, 2019, 7:49 PM
Thanks for taking the time to produce such a good set of instructions
and plans. I made the rocker for my Grandson (14 Months Old) as an Easter gift. The only changes I made to your
plan was to attach the rockers with domino tenons. Since I had the tool. The rocker is made from Louisiana cyprus.
Rockers were solid ( had some material left from house door projects)
Thanks and take care, Ken Johnson
Sunday, April 28, 2019, 4:57 PM
Love your plans. Thank you. ...Mona Marshall, NY
Saturday, April 13, 2019, 9:09 AM
Hi Phil....I just finished my first Grandpa chair. As you said I like
it so much. Very comfortable as well. I wish not all the Grandpas will rush to me to get one ?? Thanks again for
the nice plans and good ideas. Wish you a very pleasant Easter time.
Best wishes and regards from France, Gunther
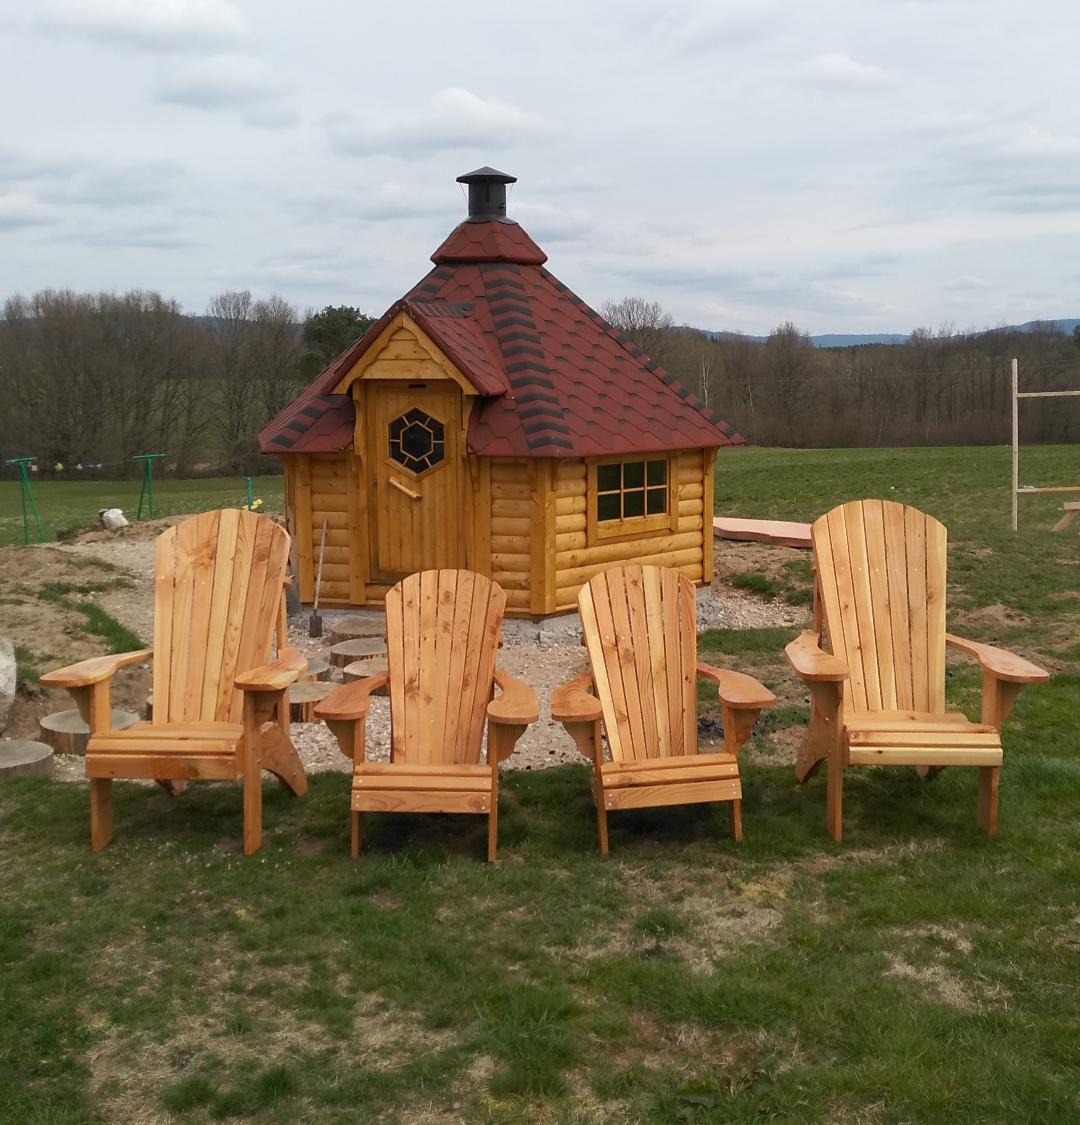
Sunday, March 31, 2019, 12:54 PM
By the way, I received some Douglas pine to fit the finish of my Kota
sauna. The result is not bad. Guenther Zimmer, France.
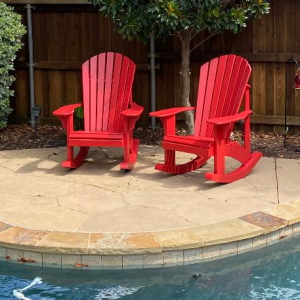
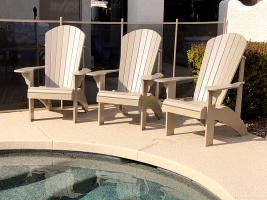
Monday, February 25, 2019, 10:17 PM
Enclosed are the pics of the first 3 Grandpa chairs next to my pool.
No SNOW here......a shout-out to you on the Awesome plans you have created....Harry Hensell, Arizona
Tuesday, March 12, 2019
Hi Phil....Hope you are well. Finally succeded to finish the first chair.
Very bad weather those days. Result seems not so bad for a first try. Thanks again and best regards, Gunther
February 16, 2019
@richswoodshop via Instagram: @thebarleyharvest the templates made perfect
parts. Not like others I have used. Setting up to make footrests next then a table. Thanks for these plans. Rich
Meyer, Reno, Nevada
Wednesday, January 16, 2019, 9:35:00 P.M.
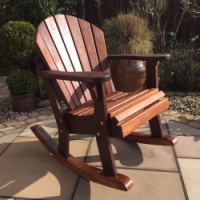
Hi Phil, I bought your Adirondack rocker plans last year with the plan
to work on them in the winter months, your plans were easy to follow and the rocker went together nicely. I did
modify a few things, one being that I used 5 quarter ceder. I am very happy with how it turned out and it seems
to fit me very well...Dan Jaspers, WA
08 Jan, 2019 from Etsy comments
Made the Grandpa chair according to plan, and it has turned out great.
Extremely comfortable! Great design, easy to follow instructions.The plans and instruction for the Beach Chair
were great. Even more so is the comfort of the finished chair. The current family discussion is now how many of
these I need to make! Out of interest, these are built out of acajou, one of the African mahogany species (Khaya
Iivorensis). They will not be treated, and will weather to a grey/silver as will the decking they are on. Well
done, Phil !
Mike, Jeffreys Bay, South Africa
Saturday, August 11, 2018 9:48 PM
Hi Phil. Very pleased to have just finished a pair of these chairs which
my wife and I both agree look great. Im a recently retired rank amateur and pretty much did all the cutouts with
a jigsaw and although that presented a few challenges, was able to produce a good result. Pics attached. Next project
the footstools! Cheers
Stewart
Saturday, June 16, 2018 7:45 AM
Hello there! Happy day in my life. I am proud to present to you my works.
I did a little changes to make it larger.
Any way thank you Phil. Now you have a place to seat in Israel :)
Peter Gelman
Wednesday, June 6, 2018 10:31 PM
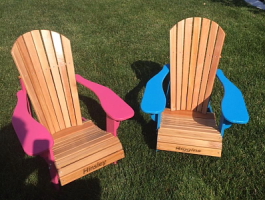
By the way your patterns are the best. I made my grand daughters their
chairs and just completed a couple for a friend grand kids. The painted ones were for my friend. She bought the
paint and I imprinted the names.
Andy & Judy Ramcharan
Sunday, May 27, 2018 4:47 PM
Hello Phil. Not so long time ago we made small business with plans for
three plans. Do you remember ? My interest about wood plans of your products continue. I have made Grandpa, Family
bench, Muskoka chair and now I will try assemble next nice models : Beach chair, Footstool, Table, Folding Muskoka
in digital versions for CNC.
Lubos, Slovakia
Thursday, May 24, 2018 8:57 PM
Hi Phil, Here's my first set of the arm chairs. Really like the design.
Thanks for a great design and instructions. These are made of full 1" clear Western Red Cedar. I'll be finishing
them with a clear penetrating oil in the next few days.
Mark Hecker
Tuesday, May 22, 2018 5:57 AM
Hello Phil, I attach photo of my effort.There are some slight variations
but all parts fitted well. My mantra was 'all recycled timber. The slats etc were Oregon I think in Canada its
called Douglas Fir, and the rockers are Cypress pine from under my sons kitchen when he renovated. It has had a
test rock by my grand daughter. Thank for the excellent instructions, John Dymock, Australia.
Monday, May 14, 2018 10:20 AM...Etsy Conversation with Brian Koehler
from DisplayVETS
Arm Chair...Hey Phil. I finished my first one of your new design. I thought
I would share photos. Your design was very simple to cut and had no issues using the Vcarve tile function to cut
longer piece. I think the next version I'm going to increase the size a little. I'm a big boy of 250lbs and fit
but would like a little more room. Shouldn't be hard to do. I love the design and very happy with the results.
I'm going to buy some more of your designs.
Saturday, May 5, 2018 11:04 PM
....Grandpa chair is from maple I cut down and milled a couple of years
ago. Your plans make it a lot easier. I appreciate the work you do on them. Mark
Thursday, April 26, 2018 1:28 PM
Aloha Phil, here's pics of two of your beautiful grandfather chairs I
made. I did everything with just circular saw, jigsaw, drill, and sander. All stainless steel hardware (I'm less
than a mile from coastline). And my wife and I are going to be grandparents!
Thanks again - Joe Flanagan
Sunday, April 22, 2018 8:31 PM
Had a great time this weekend building these from your great Grandpa
chair plans. Love the way they sit. The plans were easy to follow Thanks!
Todd
Monday, April 16, 2018 7:52 PM
I just finished the Grandpa chair this past week. So far, my favorite
is the Grandpa.
Chris
Etsy
conversation with Brett Vrancken Mar 26, 2018
I love how the chair looks and feels.
Denise P on Feb 26, 2018 on Etsy reviews
Thanks to these easy to read plans, building our Grandpa Adirondack chairs
was a breeze! Thanks so much!
amylouproductions sent you a conversation on January 17, 2018 on Etsy.
The second set of DWG files worked out great! We built 1 double and 2 single chairs. Thanks for your help!
Sunday, November 5, 2017 7:12 AM
Hi Phil ... I have attached a picture of my attempt on making these fantastic
chairs. The templates and instructions are 1st class and so easy to follow. I have now to date made 3 Children's
chairs for the Grand children - 2 Grandad - 1 Adult with 2 more in the process of being built. Also I want to build
a couple of Foot Stools over the winter for next summer.
So once again a thanks for the plans and I hope I have done justice to a great chair which now sit proudly in our
garden in England !! All the very best
Terry
Saturday, August 26, 2017 11:07 PM
#1 came out pretty well. I found I had to buy 1 X 10 stock for part A,
the main part that is the rear foot. #2 is almost done.
Bruce
Sunday, August 20, 2017 8:37 PM
Thank you! My dad and I just finished the smallest chair for my daughter
(~6mo). She loves it! The plans were so easy to follow! We did make one little change - we didn't screw the arm
pieces through the arm, but put dowels in and glued them (she has a tendency to pick at things). Also to be noted
this was my first woodworking project with no prior experience!!! She absolutely loves it and we had so much fun
building it! Now my husband wants his own! Thanks again!
Megan
Monday, July 31, 2017 8:48 AM
Phil....I finally finished all the chairs. What do you think? All my
friends and family love them.
Jose.
Wednesday, July 26, 2017 11:31 AM
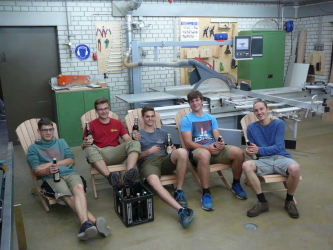
Dear Phil,
Now we have finished work. (Can you remember. You have send me the dwg because the dxf in our CNC didn´t
work)
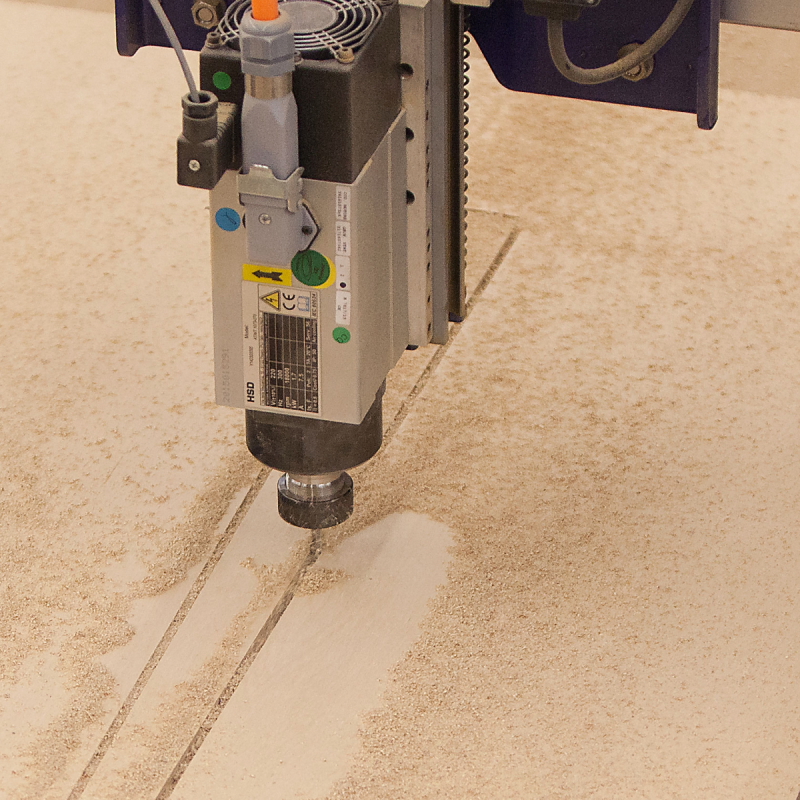
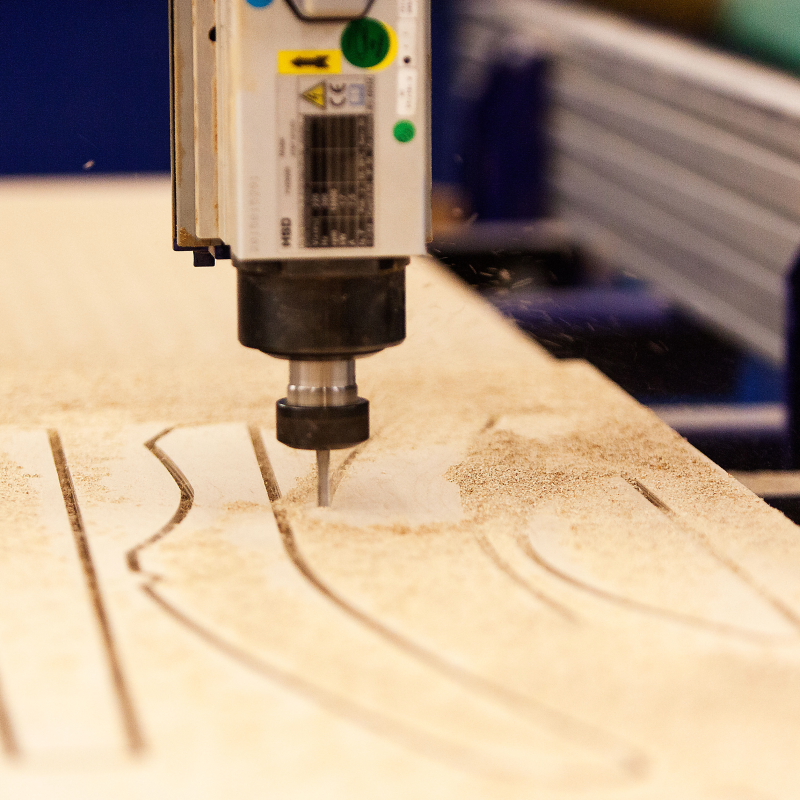
Let me explain some things. I am a teacher on Staatl. Berufsschule Berchtesgadener Land (www.bsbgl.de). We produced
the ROCKER and the BEACH CHAIR.
My students begun their education in September last year. The last projekt for this year was to produce outdoor
furniture. I think they did a great job. I can tell you for sure that we produce it for your own. We do not sell
the furniture. Have fun with the pictures. Best wishes.
Thomas
NOTE: the content of the PDF's are in German, but the CNC process images
are excellent.
Tuesday, July 25, 2017 12:35 PM
Etsy Conversation with spoletaev...With gratitude from Russia....Digital CAD PDF
Excellent drawings, as a result, a great product! It's not just a chair.
It brings a smile in children and adults.
Thank you, best regards.
Russia, Krasnodar.
Sergey.

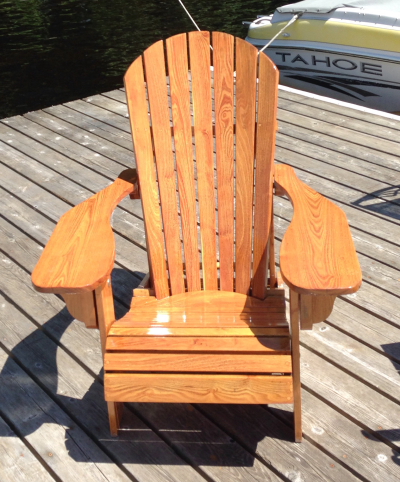
Friday, June 23, 2017 9:45 AM
Good morning. I purchased your folding adirondack chair plans a few years ago and just refinished them. They look
great again. The wood is black locust, hard as nails to work with and heavy but won't blow off the dock. Starts
off a bit yellowy but quickly warms up nicely. Photo attached of my refinished chair. Thanks
Ray
Friday, June 2, 2017 5:57 AM
Hi Phil,
I finally finished my second chair and got my chairs painted. I wasn't brave enough to deviate from your design
on my second chair to adjust how the chair sits, maybe next time...if there is a next time :) At any rate, they
turned out great. Check'em out!
Jay
Wednesday, May 31, 2017 10:09 AM
Phil....Thank you for the plans, I look forward to building a bunch of
these for my fire-pit. I'm working on the second chair this week so hopefully I can send you some pics this weekend.
Forgot I took this photo. I'm building a total of eight chairs over the summer. These first two chairs are going
to painted in tropical colors.
My friends love the chair by the way.
Jose
Friday, February 10, 2017 4:12 PM
It's beautiful....I used 1/2" red cedar stock and discovered how
much more precise I had to be than using 3/4" stock. I felt putting the arms on in the sequence you suggested
would interfere with the rest of the assembly and I think I was right. I'm going to bring it to New Orleans to
give to my grandson so I will be disassembling it and reassemble when I get there and glue every piece and re-screw
it all. I think it will last a lot longer if I glue & screw. Also I used 1 1/2" x 6 brass screws, not
1". Hope you are enjoying your vacation. The youth plans were great. No adjustment needed.
Thanks, Rob Condon
Sunday, January 15, 2017 8:19 AM
I just finished my first chair and couldn't be happier with the results
of the actual construction. I was curious though if it's possible to make the chair more angled to the back? So
for example, if my wife were to pick up her feet and cross her legs while sitting, the current configuration makes
the chair fall forward. I did re-read your guide and see where it clearly states it's designed so you can rock
with your feet flat on the ground. Would adjusting the angles of the bottoms of the front and back legs accomplish
what I'm asking? Thanks again for your time!
Jay
Sunday, January 15, 2017 9:30 AM
Hey Jay....chair looks really good ! Yes, I think if you if you shortened
the back supports and back ends of the side panels, then matched the angle to the front legs, that should work.
Send me another pick when you are done.
Regards,
Phil
Sunday, January 15, 2017 9:39 AM
Thanks Phil :) I also ended up making the entire chair 1" thick
instead of 3/4". I planed down 2x10's to get the thickness. My gosh was that a long, tedious process! Next
time I think I'll try the 5/4 board. I may try the different angles on the next chair. I planned on making two
this whole time but only started with one in case I screwed something up. First chair I've ever built! I am little
proud of myself.
Tuesday, September 27, 2016 1:45 PM
Hi Phil,
I bought your adirondack chair plans quite a while back. The good news is that I finished one - my first project
ever! And it is beautiful and comfortable to sit in......I'm almost ready to assemble the second. Thanks!
Cori
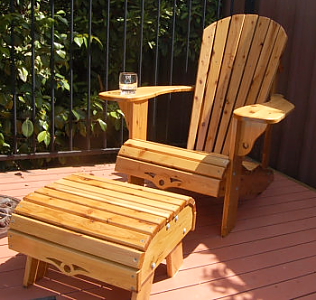
Friday, July 29, 2016 9:22 AM
Hi Phil,
Thank you so much for the plans. My customer had found a picture and
hoped I could make it wider and stronger to fit his 325lb, 6ft 4 build. I made the chairs 23" across, using
4 quarter redwood on the seat slats and arm rests, added a stemmed glass holder to the arm. I enlarged and modified
the foot rest so the legs both fold into each other for flat storage.
Normally I can look at a picture and figure it out over time, but using your plans sure saved time! Thank you for
providing the plans. Attached is a picture of the grandpa chairs and foot rests.
Thanks again!
Suzanne Brown
Brown's Wood Shop, Pioneer, California
Friday, July 29, 2016 7:51 AM
Hello Phil,
I send you Images, makes still a lot of fun....best regards from Germany
Rainer
Thursday, July 14, 2016 7:02 PM
Hi Phil,
Made a few Adirondack grandpa chairs using your plans....worked out very well.
Don
Friday, July 8, 2016 2:34 PM
Wanted to share an image with you of my first completed chair. Had a
great time making this with my CNC. Cant wait to start my second.
Etsy Conversation with sargenttarby
Thursday, June 23, 2016 9:33 PM
Here they are as promised.
Scott Miller
Monday, June 6, 2016 1:35 PM
This project is the latest from your patterns Phil.
Gary Tatro
Tuesday, May 31, 2016 10:41 AM
Hi Phil,
Have a look at what I've been doing in the UK with your chair plans.
You're absolutely right about the Grandad chair, that seems to be what people want. You have a great product for
guys like me who are trying to start up a new business and bring a little bit of Canada to the UK. My next project
is the rocking chair, I ordered the templates and plans from you on E-bay.
Kind Regards,
James

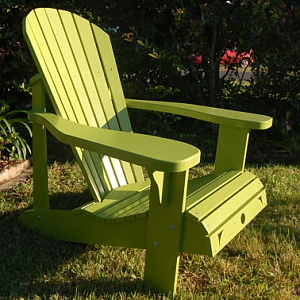
Friday, April 29, 2016 12:33 AM
Hello. I purchased your templates a while back.Have a look at my version
of your standard Adirondack.
Thanks, Mark
Saturday, April 30, 2016 9:01 PM
I used your plans to build these chairs for family Members. I designed
a different style table.
Do you happen t have any hanging swinging Bench Chair plans ? Thanks
Brian Cumming
Monday, February 29, 2016 9:19 PM
Hi Phil,
As promised I am attaching some pictures from my Adirondack Chair project. I built 2 adult and 1 youth Adirondack
Chairs for my daughter, son-in-law and grandson. My daughter will getting hers in March as a birthday present.
The others will get theres at the same time but as an early birthday present. While I was at it I decided to make
2 footstools to go with the adult chairs and a table to go with the youth chair to complete the overall ensemble.
The complete Package of Digital Plans (Item # BH-O-025) I purchased worked out terrific. I had the full size plans
printed out at a local print shop and then used the templates to cut out all of the pieces. I had piles of pieces
stacked up all over the cellar floor. Thought that I would never get the job done but I was diligent in my efforts.
I elected to use pressure treated wood and it worked out well for my first Adirondack Chair build. I slightly modified
your plans to include a brace across the bottom of the chair rails to stiffen up the frame and aid in assembly.
I also elected to dowel and pocket screw the chair arms into the braces and legs. Additionally I used pocket screws
to fasten down all of the chair seat slat boards, table top boards and footstool boards to eliminate any visible
screws. Everything came out terrific and Im extremely pleased with the purchase of these plans. Im now looking
forward to completing a set of Grandpa Adirondack Chairs unless my other daughter sees what I just made her sister
and preempts my build schedule and priorities.
Regards,
Chris
Monday, February 29, 2016 9:13 AM
Hey Phil,
Just wanted to drop you a quick line saying I finally was able to build a couple of chairs the hard way (using
only a band saw and belt sander). I did a write-up on it for my website: http://www.midnight-maker.com
. After having done it the hard way, I can't wait to cut them out with a CNC. I took one to work and got orders
for 6 of them ! Thanks again and I'll keep you updated on any new developments.
Chris
Tuesday, February 9, 2016 10:30 AM
Morning Phil,
Im sending you a few photos from yesterdays routing of the beach chair templates. If it is at all possible could
you give our program here at the High School a credit and / or link on your site? The kids would be very appreciative.
If you like these, we will be cutting the Muskoka templates this afternoon. There are quite a few of the chairs
being built this semester and I can send some pics of the completed chairs if you like.
Thanks for everything,
David Brannen, www.gphsmanufacturing.org
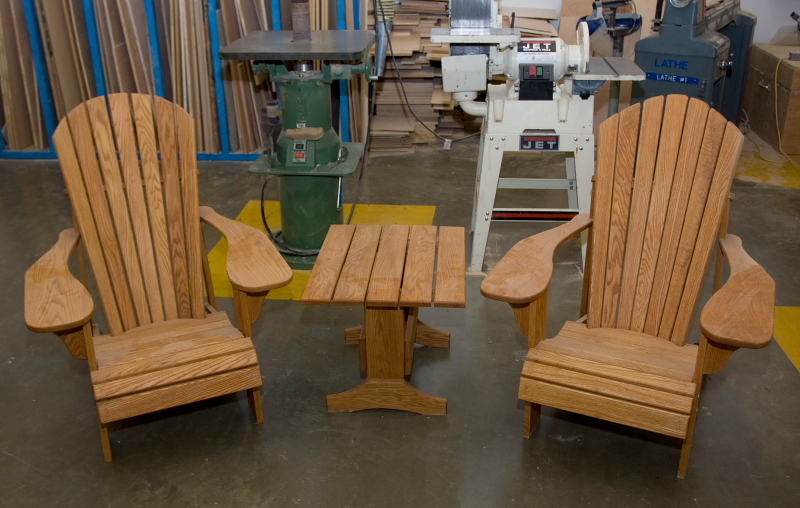
As you should be able to tell from these pictures, students have made
a LOT of your chairs over the years. On average, there are around 2 dozen of them built every school year. You
can see in the image of the poplar chair that a student designed their own ottoman for it.
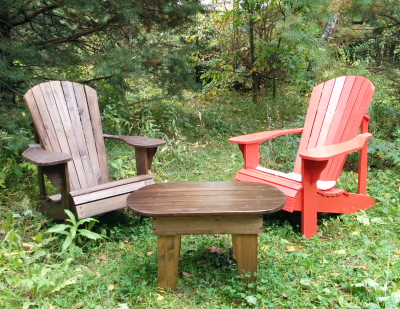
Sunday,
September 6, 2015 7:08 AM
Hello Phil, here is a pic of my two chairs and a table finally. I have painted
one in red as per my wife's request and stained the second one and the table for myself ;-) Thanks so much again
for your plans!
My kind regards,
Andrey, Moscow
Thursday, August 20, 2015 2:56 PM
Phil- here's pictures of the finished grandpa chairs. Already friends are trying to place orders.... Looking forward
to getting the footstool plans.
David Katz
Wednesday, July 15, 2015 9:01 PM
Phil, Thanks for sending the plans. I purchased the folding chair plans
from you about 8-9 month ago and we just finished that up. This is our first (trial and error) chair. One of the
local marinas wants to see some of these (folding and stationary) and may place an order for several. Not what
I was expecting, but they are fun to build. Thanks very much,
Chris
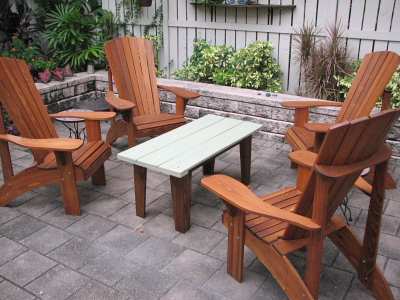
Monday, July 13, 2015 10:04 PM
Mr. Barley, I just wanted to add my comments to all the others on how
well designed the chairs and the plans were. A wonderful project to do, and extremely comfortable chairs. My guests
have all commented on how they like the more upright sitting position, especially for ease of snacking and chatting.
The four I made (of cypress, with an added table) have become the focal point of our patio. Thanks.
Matt Cory, Florida
Sunday, May 31, 2015 11:01 AM
Dear Phil, I've just built my first chair and wanted to share my excitement
with you. Thanks so much for this fantastic downloadable Adirondack plan, it went smooth right from the start.
It's the best one I could find on the web and I can't wait to build my next chairs. All my friends just love it
since it's not available over here as you can imagine... All the best for you !
My best regards from Moscow, Russia.
Andrey.

Saturday, May 30, 2015 1:58 PM
I ordered your plans for the Grandpa Adirondack chair last year and built
2, for my wife and me. I built them as a winter project and painted them in the spring. I made them out of pine
(to keep cost down) and primed and painted them with two coats of an acrylic enamel paint. Brought them up to our
seasonal campsite and placed them by the fire pit. We both them. Thought you might like to see them.
Chuck Viens

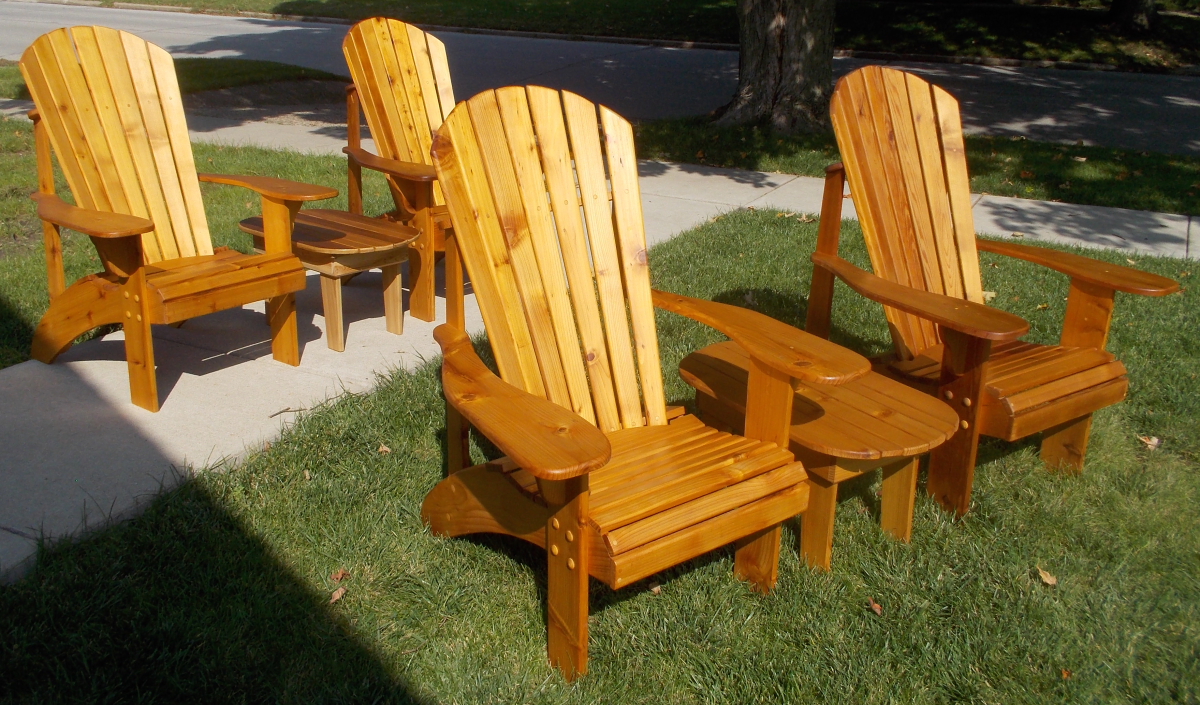
Monday, May 18, 2015 3:47 PM
Phil, these are a few of the Adirondack Grandpa chairs we have made. We've sold several and have orders for a love
seat and some of your footstool/end stands. (We just ordered that plan). We've had so many compliments from the
buyers on the comfort of the chairs. Thanks so much for improving the design!!!
Gary and Nancy Tatro
Tuesday, March 24, 2015 7:24 PM
Hi Phil
I love making the chairs and the plans are just great. After making 7
or 8 of them I have tweaked the design just a bit. We sell them at markets here in the Blue Mountains and people
love them. I try to make each one unique by the addition of different cut outs each time. I'm disappointed that
over here you can buy cheap pine replicas, that last no time at all. Nothing like the ones I make.
Stephen Hawkins, Australia
Available down under at www.etsy.com/ca/shop/Grasshopperinwood?section_id=10566197&ref=shopsection_leftnav_2
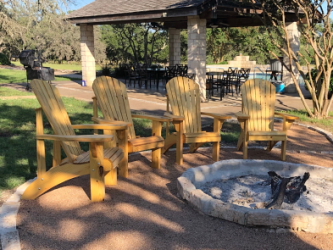
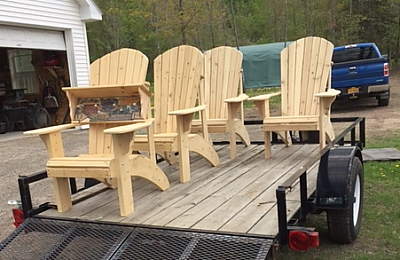
Monday, March 23, 2015 8:32 AM
Good Morning Phil.
Just wanted to pass on a couple of pics of your chair plan to you, that
I have built. Not professional but it has kept me busy! The 3 on the left are additions to the one I built last
fall for my gazebo. They are made out of heavier stock (Cedar) The one on the right is the same chair built from
a thinner stock but I added a couple of braces on the legs. They are Beautiful Chairs Phil and are very comfortable
and easy to get in and out of ! One of the best plans I have ordered so far! Thanks!
Brian Cumming
Friday, January 16, 2015 3:32 PM
Hi Phil,
Made my first chair out of your plans. It came out great! I used native,
white pine. I was very impressed with the accuracy of your full size templates. The chair sits really comfortably
and is easy to exit with the high height. Already cutting out the second chair for a matched pair.
Thank you and have a great year!
Tony Gasbarro

Tuesday, January 6, 2015 4:22 PM
Hi Phil,
Greetings from Robertson, Australia. Here's a couple of pics of the two
chairs that I finished just before Christmas.
I'm really happy with the result. They look great and are nice and comfy. Thanks Phil and all the best for the
New Year.
Cheers,
Peter Goodall
Friday, December 19, 2014 5:17 PM
Just wanted to show you my finished Grandpa Adirondack chairs and tables.
I have suggested to my woodworking friends on various sites to get your plans. I hope they have !!
Kelly Fuller
Tuesday, August 12, 2014 10:17 PM
Built your Grandpa Adirondack. Love it
Job Stevens
Friday, October 24, 2014 3:43 PM
Phil -
Just wanted to say thank you for the plans & answers during the project.
Thanks,
Jeff Fedor

CLICK
HERE for a complete step by step construction process of Jeff's
widened Folding Chairs.
Monday, October 20, 2014 3:57 AM
Hello Phil,
The first two Adrondack chairs for kids are made/built as you can see on the photos. Almost all the people have
seen the chairs asking me to build chairs like these for them.
Regards,
Rainer Lersch
Monday, August 11, 2014 4:03:27 PM
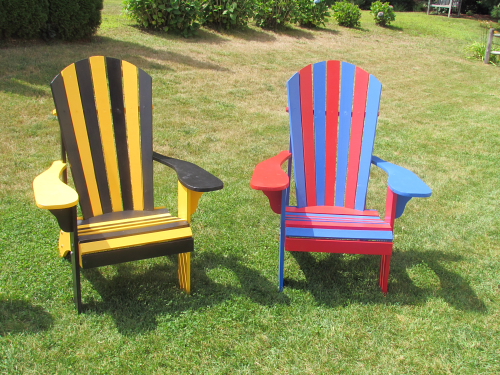
Hi Phil. I am still making chairs and enjoying giving them away. I painted
one Grandpa chair the team colors for the Boston Bruins and another for the New York Rangers hockey teams for my
sons...they look great side by side! Thanks Phil.
Coleman O'Toole
More older images on Pinterest
|